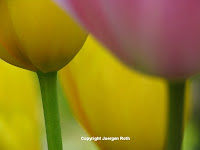
Which of the 4 photographs do you think works best for this rose flower photography image … A, B, C or D? Leave your answer/comment on my nature photography blog or on Facebook for a chance to win an approximately 20x16 inch print … your choice from my Photo Art Galleries ... shipping is on me too. The fine art photography print will be raffled off from all answers/comments on Sunday, 22 April 2012 … good luck!
Mar 31, 2012
Mar 29, 2012
Ever wondered how ...
Kermit the Frog or any other prominent person like an athlete, celebrity, movie star, or politician must feel when their personal space is invaded by a paparazzi. This nature photograph of a frog might be a good example for an out of control paparazzi. To achieve a better and more pleasing composition of the little frog, I had to get really low, hold the camera way in front of me and slowly move in closer for a frame filling photo. Although the green frog was very patient with me, I am sure in its eyes I appeared rude, pushy, and ignorant while invading its comfort zone. During the time I remember being quite happy with these first photos and not having the frog scared away. What I did not realize was the fact that I captured myself in the frogs' eye holding my camera right under its nose. I discovered the funny mishap when I checked out the pictures on my home computer after coming back from a beautiful Maine photography tour to Acadia National Park. Although the frog was a willing photo model that did not consider me an unacceptable annoyance, I was not able to get away with a decent photograph that morning ... suppose it wasn't my day, but I sure do hope the frog somehow got the same kick out of it as I did. Happy Thursday everybody! My best, Juergen
Mar 28, 2012
Painting with Light like Georgia O’Keeffe
This flower photography blog post was inspired by Georgia O’Keeffe, who I consider one of greatest artists of the 20th century. I compiled some of my personal favorite Orchid Photography Artwork and the selection varies from floral abstracts and portraits to Orchid flowers in full bloom. All Orchid flower photography fine art pictures were taken in my home studio located near Boston where I Discovered Forms and mastered The Art of Flower Photography.
Mar 27, 2012
Abstract Flower Fine Art Photography
Over the past years I have fallen in love with and focused some of my efforts on Macro Photography. Close up photography comes with many advantages like keeping traveling expenses low while shooting in your own backyard, local rose garden or arboretum. Lighting is not as critical as it is for your scenic landscape and seascape photography. Overcast is often the best choice for success. In particular I enjoy the intriguing world of flower photography. Discovering the colors, forms and texture within the flowers has become one of my prime photographic targets. Getting in real close and Exploring the Unknown is a great joy. Creating floral abstracts using the elements of design is truly inspiring and a great creative outlet for me.
Usually, we as photographers strive for sharpness from foreground to horizon within our compositions. I challenged my own quest by moving in closer and using my photographic tools to the fullest. Now-a-days it excites me to work with only millimeters of Depth of Field. Challenging and stimulating the viewers brain and curiosity is priceless.
"Cascade" and "Red Surge" are my latest abstract photography gallery addition and I hope you enjoy viewing them as much as I enjoyed taking the photos!
I am curious: What inspires you?
Mar 26, 2012
Das Foto of the Week
Every week I choose one of my favorite photographs of the week from my Fine Art landscape, flower and macro photography collection and offer it throughout that week at a discounted rate. This week's photo of the week on sale is Near and Dear displaying an abstract floral photography image of a blooming Gerber Daisy in peak colors. I choose this floral image because spring has finally arrived here in Boston and it has a very spring like feeling of fun, joy, and happiness to me.
Starting today through the week of 26 March 2012 this image from my Abstract Photography Gallery, available as art print, acrylic, or on canvas, is on sale.
Mar 23, 2012
Boston Skyline from Bussey Hill
The other day I made my way over to the Boston Arnold Arboretum for an unusual photo excursion. I regularly visit the arboretum during all New England seasons to pursue Nature Photography at its best and most convenience. It is such a fantastic and unique destination for tree, leaf, blossom, or fall foliage photography but this time I was all programmed for skyline photography. Earlier that week my wife and I took a stroll and I used the opportunity to scout Bussey Hill for a suitable location. I had a shot like this in mind for years but was never able to convey it into a pleasing image because the tree canopy was always in the view. This time I found a wide enough opening because early in the year leaves blocking the view is not a huge hurdle. After setting up the tripod and camera I decided to use the Canon 70-200mm lens with a 1.4x tele converter. This combination allowed me to precisely frame the skyline with the Prudential Center to the left, the John Hancock Building to the right, and houses of Jamaica Plain in the near foreground. The long lens combination beautifully compressed the perspective which I desired to make the image work. I manually focused and metered on the Prudential Center to achieve maximum detail in my Beantown Skyline Photography. Once the sun finally set I started shooting at about 1 minutes intervals until the sky turned dark. At one point 4 or 5 geese flew by and the sound of the wings in the dark of the early night gave me the shivers and I thought I was part of the Twilight Saga. Nonetheless, I hung in and captured a few more frames before packing up. At ISO 100, the aperture was set to f/5.6 resulting in a 6 seconds exposure time. In the digital post processing steps I removed dust spots, minimally adjusting lighting and color saturation before sharpening the final Boston Skyline image.
Mar 21, 2012
Spring Flower Photo Tips and Photography Inspiration
This week spring will be in full swing here in Boston. Temperatures will be soaring and it is that time of the year that I look so much forward to during the cold long New England winters. It is exciting and inspiring to come across the first snowdrops; crocuses bloom shortly thereafter in flashing yellow, purple and white. It is this beautiful reawakening of nature when I get ready for outdoor photography. In this blog post I compiled 15 spring flower photo tips that should inspire and help you capturing these precious spring and floral moments around your house, garden, parks and arboretums:
Photo Tip #1: Overcast sky is ideal for flower photography and provides the preferred soft lighting for exceptional flower photos.
Photo Tip #2: Make your way out early because wind is less problematic in the early hours of the day. Don't be discouraged by wind later in the day and keep shooting for interesting abstract compositions where some blossoms may be in blurred motion while others may be in focus.
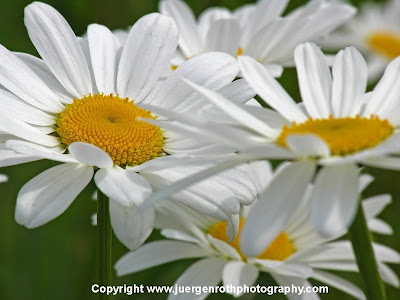
Photo Tip #3: Add more interest to your floral photography compositions by exploring your local botanical garden, park, or arboretum after rain showers or early in the morning when flowers are covered in raindrops or dew drops.
Photo Tip #4: Choose a low ISO settings like ISO25, 50, or 100 to capture maximum detail and minimize noise.
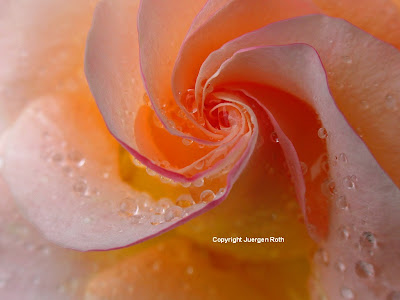
Photo Tip #5: Shoot with large apertures (small f-stop numbers like f/2.8, f/5.6, or f/8) for a shallow Depth of Field and to simplify composition.
Photo Tip #6: Use a Polarizing Filter to minimize glare and saturate colors.
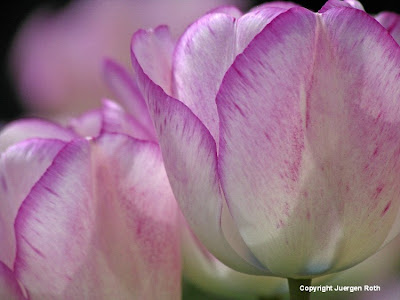
Photo Tip #7: Use a Steady Tripod or fast shutter speeds to maximize image quality.
Photo Tip #8: Ensure you are close enough to obtain a frame-filling capture of the blossom.
Photo Tip #9: Shoot in manual mode and use the camera magnification feature to precisely focus on the floral distinctive point of visual interest, e.g. petal, stamen, pistil, insect on flower.
Photo Tip #10: Frame the main floral blossom with out-of-focus surrounding blossoms and flowers, thereby conveying a 3 Dimensional Feeling and pleasing composition.
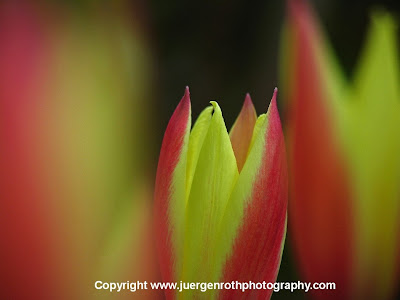
Photo Tip #11: Slow down and carefully compose your flower image to position the floral in its best possible way.
Photo Tip #12: Eliminate distracting elements in the background. Use your camera depth of field preview feature to ensure the background is blurred out and does not contain any distracting elements, consider a tighter composition, or re-frame the image.
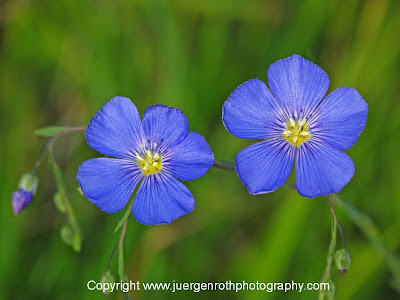
Photo Tip #13: Use white cardboard or reflectors to improve detail in shadowed and darker areas of the floral.
Photo Tip #14: Use the camera self timer, a cable release or remote release to trip the shutter. If not using live view use mirror lock up to minimize camera shake and blurry pictures.
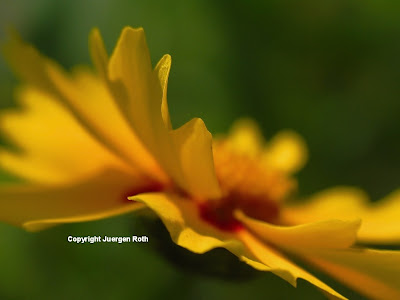
Photo Tip #15: Get creative and push the envelope by exploring Abstract Compositions and different, unusual perspectives, e.g. low camera angles, get in real close with a macro lens, or use a very shallow depth of field.
Mar 20, 2012
Exhibition at The Plymouth Center for the Arts
Serene Cape Cod and Misty Morning at Jamaica Pond were accepted into the 2nd Annual Juried Photography Exhibition: "The Fine Art of Photography". The exhibition features many artists' work including my 2 framed and signed LightJet photography prints Serene Cape Cod and Misty Morning at Jamaica Pond. The art exhibit is organized by the Plymouth Center for the Arts and runs from April 1, 2012 through April 30, 2012. The beautifully restored 1902 Russell Library gallery and 18th century Lindens building are just steps from Plymouth Rock and Plymouth’s waterfront on historic North Street. The Plymouth Center for the Arts is located at 11 North St., Plymouth Ma, 02360 and open Monday through Saturday, 10 a.m. to 4 p.m., Sundays, noon to 4 p.m. ... hope you get a chance to stop by.
Mar 19, 2012
Das Foto of the Week
Every week I choose one of my favorite photographs of the week from my Fine Art landscape, flower and macro photography collection and offer it throughout that week at a discounted rate. This week's photo of the week on sale is Crocus displaying a blooming Crocus in peak purple colors. I choose this floral image because spring has finally arrived here in Boston. I wrote about the image, circumstances, and camera settings in my nature photography blog post Spring Messengers.
Starting today through the week of 19 March 2012 this image from my Flower Photography Gallery, available as art print, acrylic, or on canvas, is on sale.
Mar 16, 2012
Orchid Flower Photography
The other week I got my hands on a pink and a purple orchid. The purple orchid turned out to be a rather disappointing photography investment but of course I enjoy daily looking at it ... no hard feelings! The pink one on the other hand was a great find and allowed me to add 4 pictures to my existing Orchid Flower Fine Art Photography Gallery. If you are a regular visitor or reader of my photo blog you may know by now that I prefer to set up my close up photography studio next to our dining room window. This window faces east and provides exceptional and beautiful morning light bouncing off my neighbors' walls into our dining room. As a base for the flower I use a chair and books that I place in front of the window. Because I prefer working with natural light I use white cardboards to direct light towards the floral when it is facing away from the window. Adjusting the white boards to explore the impact on the lighting and better control the light on the flower is a great learning experience. It is a very delicate process and one has to watch carefully to notice the adjustment for maximum impact. I am still sometimes surprised on its affect and how it positively enhances the quality of a picture. In the final macro photography of the pink orchid I positioned the flower in the best possible way that allowed the right amount of back-lighting leading to a more pleasing floral image. I chose a small aperture setting (large f-stop number) of f/32 that provided sufficient depth of field and an exposure time of 5 seconds. During post processing steps I removed dust spots, adjusted lighting, contrast and color saturation before sharpening the final macro photography image of the pink orchid "Extremely Loud and Incredible Close".
In the second floral image of the same orchid, called "Pink March Madness", I used a black card board in the background. I love using it because it makes the colors really stand out. The black backdrop adds elegance and emphasizes the grace of the orchid flower while the orchid itself epitomizes love, luxury, strength, and beauty. I applied a limited Depth of Field setting to draw all attention on the blooming floral dominating the foreground. By doing so I also created a sense of 3 dimensions within a 2 dimensional media. The aperture setting for this image was f/2.8 providing an exposure time of 1/40 seconds. During digital post processing I applied the same steps as mentioned above.
Mar 15, 2012
Twilight City Skyline Photography Tips
Magical twilight colors combined with the Boston Skyline and landmarks like the Prudential Center and John Hancock Building have become one of my favorite photographic subjects when I am not occupied with nature photography. I find it amazing when everything comes together in a few minutes and the city lights arise while the sky turns beautifully turquoise. I compiled 15 twilight photo tips that should help you get started in your own personal endeavor of capturing these precious moments ... make sure to embrace photo tip #15 for more beautiful and wow factor nature photography results:
Photo Tip #1: Ensure to bring a fully charged battery and bring a spare or two.
Photo Tip #2: Ensure to have sufficient flash card memory and bring a spare memory card.
Photo Tip #3: For best results check the weather forecast to ensure clear skies.
Photo Tip #1: Ensure to bring a fully charged battery and bring a spare or two.
Photo Tip #2: Ensure to have sufficient flash card memory and bring a spare memory card.
Photo Tip #3: For best results check the weather forecast to ensure clear skies.
Photo Tip #4: Time your Skyline Photography with natural phenomena's like full moon, super moon, or new moon to add more interest to the composition.
Photo Tip #5: Arrive 1/2 hour before sunset to allow for sufficient time to set up and compose a pleasing skyline photography image.
Photo Tip #6: Use a Steady Tripod to compensate for the expected long exposure times.
Photo Tip #5: Arrive 1/2 hour before sunset to allow for sufficient time to set up and compose a pleasing skyline photography image.
Photo Tip #6: Use a Steady Tripod to compensate for the expected long exposure times.
Photo Tip #7: Use low ISO settings like ISO25, 50, or 100 to minimize Camera Noise.
Photo Tip #8: Best time to capture twilight photos is 20 to 30 minutes after the sun has set.
Photo Tip #9: Be prepared well because the optimum light does not last long.
Photo Tip #10: Set up tripod and camera prior to the actual sunset.
Photo Tip #11: Shoot with small apertures (large f-stop numbers like f/11, f/16, or f/22) to maximize Depth of Field.
Photo Tip #12: Shoot in manual mode because auto-focus does not work that well in low light.
Photo Tip #11: Shoot with small apertures (large f-stop numbers like f/11, f/16, or f/22) to maximize Depth of Field.
Photo Tip #12: Shoot in manual mode because auto-focus does not work that well in low light.
Photo Tip #13: Use the Camera Self Timer, a cable release or remote release to trip the shutter. If not using live view use mirror lock up to minimize camera shake and blurry pictures.
Photo Tip #14: Keep shooting when the twilight sky starts glowing and the city lights are beginning to come alive.
Photo Tip #15: Don't limit yourself to twilight photography of city skylines; use twilight to great effect and advantage in your landscape and seascape Nature Photography.
Photo Tip #14: Keep shooting when the twilight sky starts glowing and the city lights are beginning to come alive.
Photo Tip #15: Don't limit yourself to twilight photography of city skylines; use twilight to great effect and advantage in your landscape and seascape Nature Photography.
Mar 14, 2012
Incredible Bird Photography
In this nature wildlife photography blog post I compiled some of my personal favorite Bird Photography Artwork. The selection varies from bird portraits to photos of perching and grooming Herons. All pictures were either taken in the beautiful wilderness areas of southwest Florida or in my home state of Massachusetts where I benefited from my own Bird Photography Tips.
Mar 13, 2012
Inspirational, Motivational, and Happiness Quotes
I stumbled upon these 5 inspirational, motivational, and happiness quotes that move and inspire ... hope you enjoy them too:
1. "Do not wait for your ship to come in, swim out to it." ~ Unknown
2. "The future depends on what we do in the present." ~ Mahatma Gandhi
3. "Don't go through life, grow through life." ~ Eric Butterworth
4. "Perfection is not attainable, but if we chase perfection we can catch excellence." ~ Vince Lombardi
5. Believe that you have it, and you have it." Latin Proverb
Subscribe to:
Posts (Atom)