
Award Winning New England Fine Art Photography by Greater Boston photographer Juergen Roth. This photo blog provides photo tips, stories behind photography images, and plenty of inspiration.
May 31, 2012
May 30, 2012
Magic of Light

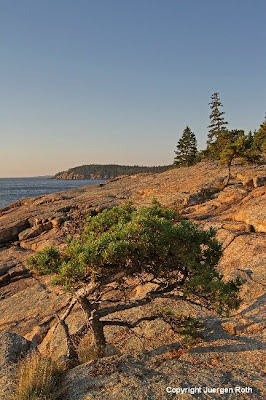
Twilight is one of my favorite times to take photographs. It makes for spectacular landscape and city skyline photography. The best time is 20 to 45 minutes before sunrise or sunset. The optimum light does not last long. Because twilight is hard to predict I set up my tripod and camera prior to the actual sunrise or sunset and then capture the moment in 1 or 2 minute intervals within my camera. This approach requires sufficient battery power and flash card memory to keep shooting while closing in on the optimum light. The twilight effect also works on cloudy days and up to 30 plus seconds exposure times are not unusual. In Morning Bliss I used twilight before the sunrise to my advantage in Maine Acadia National Park. Arriving early enough to set up and find a suitable location was crucial. I then followed the aforementioned approach to close in on the optimal light and convey the wonderful New England outdoor experience of a beautiful sunrise in my photograph.
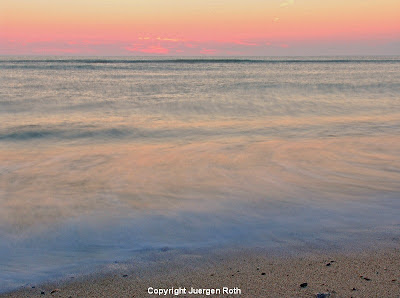
In this seacoast photography image I had set the aperture to f/11 and
chose an ISO100 setting that provided me with a 10 second Exposure time.
I used a graduated neutral density filter to overcome the high contrast
of foreground and sky. During post processing I slightly adjusted
contrast, lighting, and color saturation before sharpening and saving
the jpeg image.
To learn the magic of light, get up
before sunrise ... and watch. - Ted Grant
May 29, 2012
James P. Kelleher Rose Garden

The James P. Kelleher Rose Garden, near Fenway Park in Boston is only a short drive from my home. It's another rose garden only 15 minutes away from my house that provides me with lots of photographic objects in the early summer. Rose gardens and parks are a great venue for creating flowers photos. I also like that the park's name plates provide identification for each rose. The rose garden is already in bloom. Lots of people at the time but I blended in perfectly with the photographing crowd that was present. I was looking for a Magenta Rose to add to my fine art Rose Collection and succeeded finding an attractive couple that were still in beautiful bloom. I arranged my tripod and first focused on the magenta rose in the foreground. After taking a few digital pictures I zoomed out and re-composed the image to include the second rose in the background. The focus point in this rose picture was on the petals where they spiral together. Using the camera self timer and exposure bracketing in both pictures I captured a series of three images with different exposures settings. The at 1/3 step underexposed capture worked best and the aperture was set to f5.6 resulting in a shutter speed of 1/400 second for both images. During the digital post processing steps I applied minor adjustments to contrast, saturation and sharpness.

May 28, 2012
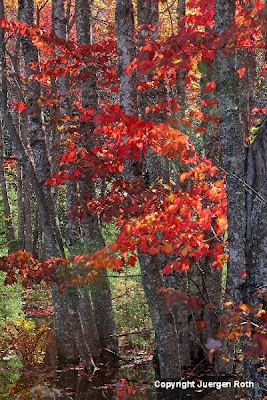
Intimate New England Landscape Photography
In this latest photography blog post I compiled some of my personal favorite New England Photography Artwork from my galleries.
The selection of intimate landscape photos varies from Cape Cod to Boston in Massachusetts to the White Mountains in New Hampshire to Acadia National Park in Maine. Hope the pictures bring back good memories and you enjoy the journey of travel picture.
Adopt the pace of Nature; her secret is patience. ~ Ralph Waldo Emerson


Like me me on Facebook!
May 27, 2012
Das Foto of the Week

Every week I choose one of my favorite photographs of the week from my Fine Art
landscape, flower and macro photography collection and offer it
throughout that week at a discounted rate. This week's photo of
the week on sale is Daydreamer displaying beautiful tulip flower photography at its best.
Starting today through the week of 27 May 2012 this tulip photography image from my Flower Photography Gallery,
available as art print, acrylic, or on canvas, is on sale.
May 24, 2012
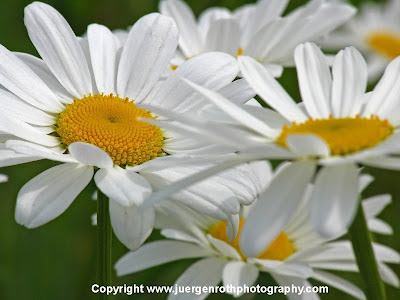
Red Tulip Fest In Brookline Massachusetts

Want to learn more ~ 15 Flower Photography Tips.

May 22, 2012
Saturday Night Live in Boston

Capturing Boston Photos and in particular the skyline is something I do on a regular basis when not occupied with nature photography. I went out the other night to photograph the Boston Skyline from the Longfellow Bridge. The Earth Fest at the Hatch Shell was closing down and people were still crossing over towards Cambridge. The outlooks on the bridge provide classic skyline views of Beantown. The Redline made it a little bit challenging at longer exposure times but following my own Skyline Photography Tips made me completing the task and bringing home a pic to share and add to my galleries.

May 19, 2012
Some of My Favorite Artists and Art Quotes

In this latest nature photography blog post I compiled some of my favorite artists and art quotes. The photo artwork and poems have been inspiring to me and my daily quest for beautiful photography ... hope you enjoy them as much as I do!
The camera sees more than the eye, so why not make use of it? - Edward Weston
Unless a subject interests me, I’ll
pass it over and save my film for better things. - Andreas Feininger

A good photograph is knowing where to
stand. - Ansel Adams

Nothing is repeatable especially the
light. - Bob Croxford

Adopt the pace of Nature; her secret
is patience - Ralph Waldo Emerson

It is an illusion that photos are made
with the camera, they are made with the eye, heart & head - HenriCartier-Bresson
Photography helps people to see ~ Berenice Abbott
Through my lens the world becomes more intimate and colorful
~ Juergen Roth

May 17, 2012
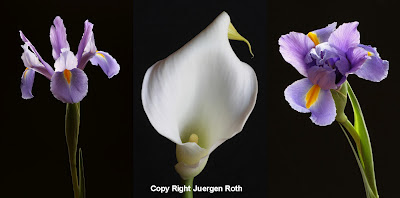
Color Meaning and Emotion in your Artwork

When I am out and about pursuing nature Photography I am almost
always instinctively attracted by the strong colors of a photographic
object. This is the decisive moment for me when I decide it is
worthwhile to pull out my camera and tripod to capture a natural
delight. I am much more aware of colors and their effect on people then I
used to be and I try to use them to my photographic advantage. For
example, one connects the color red with energy, danger, strength and
power but also with passion, desire and love as often conveyed in red
roses. Yellow is the color of sunshine. It's connected with joy,
happiness and energy. Sunflowers are the perfect example for happiness
and joy. I always get an extra kick out of them when I photograph them.
Orange combines the energy of red and the happiness of yellow. Blue
represents the opposite of warm colors like red and orange. It is often
associated with intelligence, faith, truth, and heaven. Blue also
has a calming effect and conveys Tranquility and calmness. Green
represents the color of nature. I like to associate green with harmony,
freshness and fertility. White may suggest innocence, purity, and
virginity. White is often considered the color of perfection. A Black Background is mysterious, associated with the unknown and adding
elegance to a photograph.
May 15, 2012
Tips for Sharper Photography Images
Most photographers quest for pin sharp and high quality images. In this latest photography blog post I compiled 15 photo tips on how to achieve sharper photos with our photography gear. This blog post links to other related topics that deepen the understanding of correct exposure, depth of field or how to use your tripod correctly ... hope you explore and enjoy!
Photo Tip #1: Find your lens sweet spot where it produces sharpest and best quality photographs per manufacturer design. Check reviewers and sites like Digital Photography Review to find out anything and everything about your photography gear.
Photo Tip #2: Know your Camera Noise level limit where it become unacceptable so you can adjust your ISO setting for faster shutter speeds accordingly. High noise levels produce poorer image quality. In example, ISO 800 might be unacceptable but since you know ISO 400 is all right you may choose ISO 400 and adjust to a larger aperture to achieve a desired faster shutter speed and compensate for the lower ISO setting.
Photo Tip #3: Utilize lowest possible ISO settings like ISO 100 and below for higher quality pictures. Do not use your camera Auto ISO setting since at low light it will adjust to high ISO settings that produce more noise. Instead get in the habit of using your tripod even when sufficient light is available … on a different note this will benefit in composing an image as well.

Photo Tip #4: Pay attention to the surrounding environment. Any ground vibration like passing cars, trains or even people walking by may not be compensated by the tripod and may lead to blurry pics.
Photo Tip #5: Use a Sturdy Tripod and head to minimize camera shake during photo exposure. Turn off your lens image stabilization when using your tripod.

Photo Tip #6: Watch your shutter speed to ensure you can still hand hold your camera and lens while taking the picture. If there is no tripod available, turn on the lens stabilization feature and use other supporting aids like a tree trunk, a wall or your camera bag to stabilize your set up … whatever works to keep your camera and lens stable at slower shutter speeds.
Photo Tip #7: Ensure your focus point is spot on. Depth of Field (DOF) falls approximately 1/3 in front and 2/3 past the focus point. Aperture provides you the control to maximize or minimize DOF thereby impacting your image sharpness.
Photo Tip #8: Set the correct aperture to achieve sufficient DOF for your artistic needs. A large aperture (small f-stop Number like 5.6 and less) provides shallow depth of field with faster shutter speeds while small apertures (large f-stop Number like f/8 and up) will provide you with sharpness from foreground and longer exposure times. Longer exposure times require a tripod or other stabilization to avoid blurry pictures.
Photo Tip #9: Understand Exposure and how aperture, shutter speed, lens magnification, and ISO come together and how these photographic camera and lens controls may interfere or enhance taking razor sharp photos.

Photo Tip #10: Use manual focus and the magnifying camera feature to precisely pin your focus point and apply the correct exposure settings to achieve your artistic photographic goals.
Photo Tip #11: Use your Camera Self Timer in combination with Live View or mirror lock up to minimize camera shake when releasing the shutter.

Photo Tip #12: Review your photos on the camera screen using the magnifying feature. If sharpness and image quality is unsatisfying, keep shooting to ensure you get the sharp, high quality image you desire.
Photo Tip #13: Sharpen your image during post processing to achieve appropriate sharpness in your pictures.
Photo Tip #14: Save on the camera body and instead invest the savings in a higher quality lens or tripod.
Photo Tip #15: Forget almost all of the above and try Intentional Camera Movement. ICM can be lots of fun and very rewarding


May 13, 2012
Das Foto of the Week

Every week I choose one of my favorite photographs of the week from my Fine Art
landscape, flower and macro photography collection and offer it
throughout that week at a discounted rate. This week's photo of
the week on sale is Sunshine on my Shoulders displaying beautiful rose flower photography at its best.
Starting today through the week of 14 May 2012 this tulip photography image from my Rose Flower Photography Gallery,
available as art print, acrylic, or on canvas, is on sale.
May 9, 2012
Elegant Portrait Style Flower Photography Fine Art

In recent months I explored black cardboard as the
backdrop for my flower photography. Dark backgrounds really make the colors of a flower pop and
give the image a touch of elegance. Usually I choose a large enough
black cardboard that I position behind the floral
photographic object using the backrest of a chair for support. As a base
I use the chair itself that I place in front of a window. The set up
of my Macro Photography
studio next to our dining room window provides exceptional and
beautiful lighting conditions in the morning. White cardboards are used
to enhance the light and direct the light towards the floral when it is
facing away from the window. I always use a few hardcover books to
stabilize and adjust the height of the flower for an optimal set up and best lighting impact.
I often adjust the white boards to explore the impact on the lighting
and better control the light on the flower. Adjusting the light with
the white boards is a great learning experience for us photographers
and often leads to more inspiring and beautiful fine art photography
artwork. There are certain positions when the white cardboard unleashes maximum impact and it is our job to explore the best impact by rearranging and adjusting the boards in different angels or slants. At small apertures (high f-stop numbers like f/16 and up) combined with low ISO settings (ISO100 and less) longer exposure times become evident and require the use of a Tripod. I always prefer the use of a tripod because it slows down the photographic process benefiting composition and image quality. Landscape versus Portrait Format
is one of the first decisions we make when taking a picture and sometimes a picture works in both formats. That is not always the case and then we
have to decide on the best format to support the strongest composition.
Backlighting provides beautiful illumination of flowers that keeps
the viewer captivated. In these portrait style flower photographs the apertures were set between f/8 and f/32 providing maximum Depth of Field
and long exposure times of 1 - 20 seconds. In the post processing
steps I removed dust, minimally adjusted brightness, contrast and color
saturation before sharpening the final images.

May 8, 2012
New York City Skyline Photography

We spent a couple of nights in New York City last weekend where I got a
chance to photograph a classic view
of the lower Manhattan New York City skyline at twilight. The panoramic pic, showing
cityscape landmarks such as Freedom Tower (it was the night before it
became the tallest building in the Big Apple again), Brooklyn Bridge,
East River and FDR Drive, was taken from the Brooklyn Bridge Park in
Brooklyn, NY. The long wait finally paid off when the sky turned purple and the city lights were alive.
The second shot was taken from the same location and I took advantage of that view when passing boats did not allow for taking pictures of the Brooklyn Bridge and Manhattan skyline. City Skyline Photography at twilight is a Tricky Endeavor and we must be prepared and keep shooting during these precious moments after sunset. I like this picture because it shows more of the typical blue in the sky during twilight. The Empire State Building in the far distance gives the picture the extra something.

The second shot was taken from the same location and I took advantage of that view when passing boats did not allow for taking pictures of the Brooklyn Bridge and Manhattan skyline. City Skyline Photography at twilight is a Tricky Endeavor and we must be prepared and keep shooting during these precious moments after sunset. I like this picture because it shows more of the typical blue in the sky during twilight. The Empire State Building in the far distance gives the picture the extra something.
May 6, 2012
Das Foto of the Week

Every week I choose one of my favorite photographs of the week from my Fine Art
landscape, flower and macro photography collection and offer it
throughout that week at a discounted rate. This week's photo of
the week on sale is Afternoon Bliss displaying tulip flower photography at its best.
Starting today through the week of 07 May 2012 this tulip photography image from my Flower Photography Gallery, available as art print, acrylic, or on canvas, is on sale.
Subscribe to:
Posts (Atom)